DTF Printing has surged in popularity as a versatile, approachable method for creating vibrant designs on apparel and other fabrics. If you’re exploring new ways to bring your artwork to textiles, understanding Direct-to-Film transfers and the DTF transfer process can open exciting possibilities for small shops, hobbyists, and designers alike. This beginner-focused overview introduces DTF printing for beginners, helping you grasp the workflow, materials, and practical tips you’ll need to start confidently. From choosing DTF printing equipment to mastering pre-press and curing steps, the guide emphasizes accessible gear and a safe, scalable approach. Whether you’re comparing DTF vs DTG printing or simply testing the waters of film-based transfers, you’ll find clear guidance and actionable insights.
Beyond the basics, consider terms like film-based textile transfers, an image-on-film workflow that travels from digital design to fabric through heat and adhesive. Other terms you’ll encounter include specialty transfer film processes, powder-assisted transfer, and sheet-to-fabric printing, all pointing to the same core concept of moving art from film to garment. As you explore these variants, keep in mind the end goals—vibrant color, durable adhesion, and compatibility with a wide range of fabrics—so your learning stays practical. By framing the topic with related terms, your content remains accessible to readers who search with alternative phrasing. In practice, this LSIs-driven approach supports broader SEO signals while guiding beginners through practical steps. These approaches align with beginner-friendly workflows, enabling you to test designs quickly. Over time, you may layer on advanced techniques, like color management and ink optimization, without sacrificing accessibility.
DTF Printing Essentials: What It Is and Why It Works
DTF Printing, or Direct-to-Film transfers, is a digital textile technique that prints artwork onto a film and then transfers it to fabric using heat. This approach enables vibrant color density and good on-dark performance without requiring a dedicated garment printer. By understanding the Direct-to-Film transfers workflow, designers and shop owners can predict results, manage expectations, and plan production with confidence.
For beginners exploring options like DTF printing for beginners, the method offers flexibility and broad fabric compatibility. It’s common to use standard inkjet hardware or a dedicated DTF printer with film and bonding powder, making the entry point approachable for hobbyists and small studios alike. Emphasizing the core advantages—durable results, strong color, and practical tolerance for various fabrics—helps set realistic expectations for first projects.
From Design to Transfer: The DTF Transfer Process
The DTF transfer process unfolds in a practical sequence: design, printing to film, powdering, curing, and transferring. This Direct-to-Film transfers workflow starts with a clear, high-resolution design and ends with a heat-pressed garment that carries a durable, vibrant image.
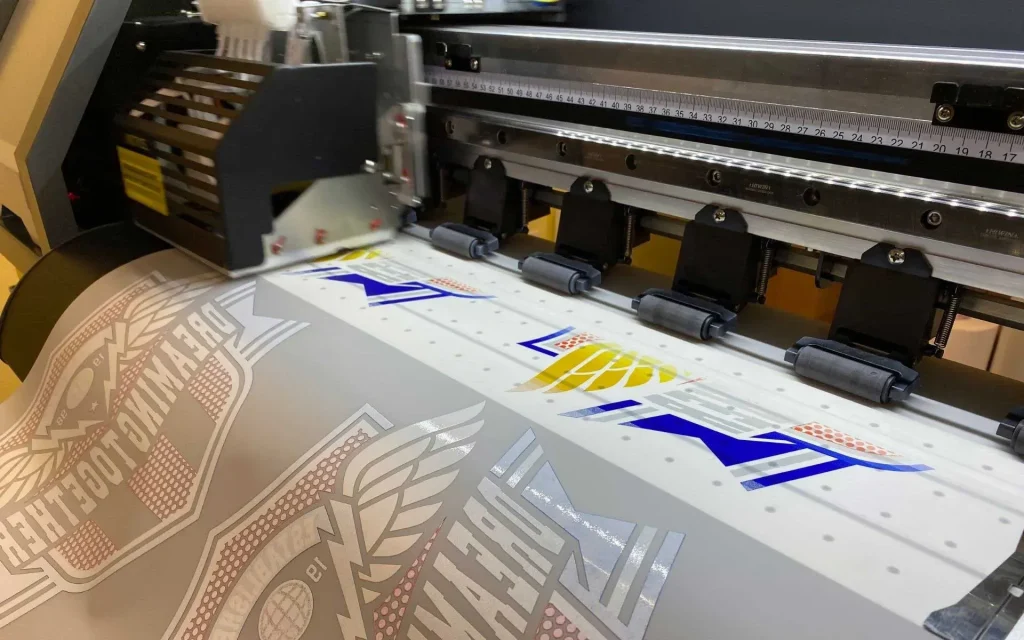
Key steps include printing to PET film, applying adhesive powder while the film is warm, curing the coating, and then transferring the design to fabric using a heat press at recommended temperatures. Understanding these stages helps anyone evaluating DTF printing equipment or comparing DTF vs DTG printing decide which method best fits their workflow and production goals.
Equipment and Materials: Building Your DTF Printing Toolkit
Getting started requires a reliable mix of DTF printing equipment and consumables. A DTF printer or a standard inkjet printer configured for DTF workflows, paired with DTF films and carrier sheets, is essential for producing clean transfers. White ink for an underbase is critical for opacity on darker fabrics, while adhesive powder and a curing solution complete the core system.
Other important items include a heat press with even temperature control, curing equipment such as a dedicated powder-curing oven or a conveyor-style setup, and an assortment of blank garments in cotton, blends, and polyester. Selecting high-quality films and consistent curing tools helps ensure predictable results across runs and reduces the need for reprints.
DTF Printing for Beginners: Practical Tips for Consistency
DTF printing for beginners benefits from a disciplined, repeatable workflow. Start with test runs on light and dark garments to gauge color density, opacity, and hand feel, and document the results to reproduce them later. Calibrate color profiles and verify white underbase behavior to ensure reliable outcomes across batches.
Pre-press preparation, accurate alignment, and careful powder application are common areas where beginners encounter challenges. Pressing the garment to remove moisture, applying powder evenly, and following curing times closely all contribute to durability and wash-fastness. Maintaining a simple, scalable process with clear guidelines helps maintain consistency as you scale up.
DTF vs DTG Printing: Key Differences and Tradeoffs
Choosing between DTF vs DTG printing often comes down to substrate versatility, cost, and production workflow. DTF transfers can work on a wider range of fabrics, including blends and some polyesters, while DTG is frequently favored for high-detail work on cotton. This comparison informs equipment investments and project planning for small shops and hobbyists.
Durability, hand feel, and per-unit costs also vary. DTF benefits from adhesive powder and robust curing to improve wash-fastness and opacity, whereas DTG can offer softer hand on select fabrics but may require different pretreatment. Understanding these tradeoffs helps you select the right method for a given design, budget, and run length.
Design, Pre-Press, and Quality: Optimizing DTF Results
Creative design choices, proper pre-press, and accurate color management are central to high-quality DTF Prints. Work at 300 dpi or higher for crisp detail and plan white underbase strategically for dark fabrics to achieve strong opacity and vibrant color reproduction. Direct-to-Film transfers benefit when your artwork includes clear separation and scalable vector elements converted to raster formats as needed.
Pre-press alignment, print direction, and post-transfer care all influence final results. Ensure garments are flat, error-free designs are loaded with proper color profiles, and you follow manufacturer guidelines for temperature, pressure, and time. Documented settings for a range of films and fabrics enable repeatability and faster production as you expand your catalog and services.
Frequently Asked Questions
What is DTF Printing and how do Direct-to-Film transfers work?
DTF Printing, or Direct-to-Film printing, is a digital textile technique that prints an image onto a transfer film, applies bonding powder, cures it, and then transfers the design to fabric with a heat press. You typically print to a film using a DTF-capable printer or a capable inkjet setup, then finish with heat pressing. DTF transfers work on a wide range of fabrics (cotton, blends, polyester) and offer vibrant color density without requiring a dedicated garment printer.
DTF transfer process: what are the essential steps from design to final transfer?
A typical DTF transfer process includes: 1) design preparation with high-resolution artwork and color accuracy (plan for a white underbase on dark fabrics if needed); 2) printing onto a PET transfer sheet; 3) applying an adhesive bonding powder; 4) curing the powder; 5) transferring the dried film to fabric with a heat press at the recommended temperature and time; 6) optional finishing for durability.
DTF printing for beginners: what equipment and supplies do I need to start?
For beginners, you’ll need a DTF printer (or an inkjet printer configured for DTF inks and films), DTF films and carrier sheets, white ink for the underbase, adhesive powder, a curing setup (oven or heat press), a reliable heat press, and blank garments in a range of fabrics.
DTF vs DTG printing: which is better for beginners and small shops?
DTF printing offers broader substrate versatility (cottons, blends, some polyesters) and typically lower per-unit costs for small runs, with easier setup since you don’t need a dedicated garment printer. DTG excels on high-detail photos on cotton but usually has higher upfront costs and more limited fabric compatibility. For beginners and small shops, DTF vs DTG often favors DTF for flexibility and on-demand production.
What are common mistakes beginners make with DTF Printing and how can I avoid them?
Common mistakes include skipping pre-press and white underbase planning, uneven or inconsistent powder application, insufficient curing, misalignment during transfer, and not testing on different fabrics. To avoid them, pre-press the garment, ensure even powder, cure properly, use alignment guides, and run test prints on your target fabrics.
How can I optimize color accuracy and durability in DTF Printing?
To optimize color accuracy and durability in DTF Printing, work at 300 dpi or higher, manage color profiles, and plan a white underbase for dark fabrics. Calibrate your printer regularly, print test swatches, and ensure proper curing at the recommended temperature (roughly 160–170°C / 320–340°F) for 10–20 seconds with steady pressure. Use quality films and inks and follow wash-care guidelines to improve wash-fastness.
| Topic | Key Points |
|---|---|
| What is DTF Printing? | Direct-to-Film (DTF) printing is a digital textile technique that prints an image onto a special transfer film, applies bonding powder, cures it, and transfers the design to fabric with heat. You typically print to film with a standard inkjet or a DTF printer—no dedicated garment printer required. The result is a durable, high‑resolution image with strong color density, usable on a wide range of fabrics (cotton, blends, polyester). The transfer is finished with heat after printing. |
| Why choose DTF Printing? | Offers vibrant colors, works on dark and light fabrics, and provides a soft hand feel. It can be more cost-effective for small runs or on‑demand work and is flexible across garment types, making it a practical alternative to DTG or screen printing. Understanding the workflow helps predict results and plan production with confidence. |
| DTF transfer process: the core workflow | A typical workflow includes design, printing to film, powdering, curing, and transferring. Steps: 1) Prepare design (high res, color-accurate presets; white underbase for dark fabrics). 2) Print to film with DTF-capable printer. 3) Apply adhesive powder while warm. 4) Cure the film. 5) Transfer to fabric with heat and pressure (e.g., around 160–170°C / 320–340°F for 10–20 seconds). 6) Optional finishing (extra press or cure for durability). |
| Equipment and materials | DTF printer or compatible inkjet, DTF films and carrier sheets, white ink for underbase, adhesive powder, curing equipment, heat press, and a variety of blank garments (cotton, blends, polyester) and protective sheets. |
| Design considerations for successful DTF prints | Work at 300 dpi or higher for crisp detail. Plan a white underbase for dark fabrics to improve opacity and vibrancy. Manage complex gradients with tested settings. Ensure proper print direction and alignment for multi‑color designs. Consider garment material—cotton yields strong results, while blends and synthetics may need heat/time adjustments. |
| A practical beginner workflow: step-by-step tips | Start with test runs on light and dark garments. Pre‑press the garment to remove moisture and wrinkles. Print with calibrated color profiles and verify white underbase when needed. Apply powder evenly and cure thoroughly. Align the transfer carefully, press with medium pressure for the recommended time, and let it cool before peeling. Consider a post‑press cure for durability. |
| DTF vs DTG: understanding the differences | Substrate versatility: DTF works on a broader range of fabrics (cottons, blends, some polyesters) than DTG, which is often cotton‑heavy. Cost and scalability: DTF can be cheaper for small runs and easier to set up; DTG may excel at high‑detail photography on cotton but can be pricier upfront. Durability and wash‑fastness depend on curing and powder adhesion. Feel: DTF prints can feel slightly thicker than DTG. |
| Troubleshooting common issues in DTF Printing | White underbase showing through on dark fabrics: increase opacity or adjust underbase. Powder not adhering: check curing time/temperature and ensure even application. Cracking/peeling after wash: verify proper cure and transfer parameters. Fading colors: recalibrate ink/color management and consider stronger white underbase for dark fabrics. Misalignment: use alignment guides and pre‑press to flatten fabric. |
| Maintenance, safety, and best practices | Regular printer cleaning, replace filters as needed, and use quality inks/films. Periodically calibrate color/density. Ensure proper ventilation when curing powders and storing powders dry. Replace wearables like heat presses and mats as needed, and verify temperature accuracy. |
| Common mistakes beginners make | Skipping pre‑press or underbase planning; inconsistent powder application; relying on a single fabric type without testing; rushing the transfer without proper curing or cooling. |
| Final tips for beginners on a budget | Start with a small kit (compact heat press, limited film, a few test garments). Use a library of test prints to calibrate settings. Build a scalable workflow and document temperatures, times, and pressures. Learn from online communities and tutorials, comparing results across films and inks. |

