Custom embroidered patches offer a simple, cost-effective way to personalize jackets, bags, hats, uniforms, and more. Whether you’re outfitting a sports team, club, or a fashion line, patches can tell a story, signify membership, and add color and texture to everyday items. But the key to a lasting, professional-looking result is knowing how to apply embroidered patches using the right method for the fabric and project. In this guide, you’ll learn three common patch application methods—sewing patches onto fabric, iron-on patches instructions, and adhesive patch method—plus practical tips on preparation, tool selection, and maintenance. By the end, you’ll be confident choosing the best method for your patch design and ensuring it stays put wash after wash.
Beyond the brand name, these fabric badges function as stylish garment embellishments, allowing teams, clubs, and brands to communicate identity through textiles. Think in terms of backing and mounting styles—sew-on, iron-on, and glue-on options—and how they pair with different fabrics for durability and finish. Using related terms such as badge design, textile branding, garment adornment, and patch mounting helps search engines understand the topic while guiding readers through practical choices. Whether you’re upgrading a denim jacket, a sports uniform, or a backpack, this broader vocabulary supports clear, user-friendly explanations about application methods and care.
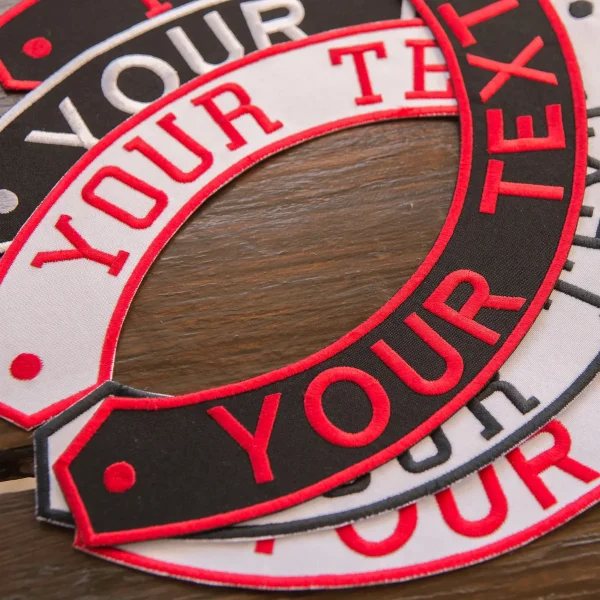
Understanding Patch Types and Backings for Custom Embroidered Patches
Custom embroidered patches come with different backings—sew-on, iron-on, and adhesive—and each backing supports a different fabric and wear pattern. Sew-on patches are typically the most durable, especially for activewear or items that go through frequent washing. Iron-on patches offer a quick, no-stitch option, ideal for temporary fixes or when you’re embellishing a project with minimal sewing. Adhesive patches provide a convenient, reversible option when sewing isn’t feasible.
Choosing the right backing shapes the final look and longevity of your project. For denim, canvas, twill, and heavy cotton, sew-on patches yield the strongest bond. Iron-on patches work well on cotton and some blends when you follow temperature guidelines. Adhesive patches are handy for delicate fabrics or temporary branding, but may require extra care during washing. When you start with the focus on custom embroidered patches, you’ll see how the backing influences the outcome.
Tip: consider your care routine and laundering expectations to pick the best method. If durability is paramount, plan for sew-on patches; for speed, iron-on patches; and for reversibility or gentle fabrics, adhesive patches. A thoughtful selection reduces edge lifting and patch loss over time.
Sewing Patches Onto Fabric: Best Practices for Durability
Sewing patches onto fabric provides the strongest, longest-lasting bond and is widely used on denim, canvas, twill, and heavy cotton. This method creates a secure edge that resists fraying and washing wear when done with proper technique.
Position the patch, secure with pins, and choose thread color that blends with the patch border or garment. Use a sturdy needle for heavy fabrics, and select a zigzag or satin stitch with a moderate stitch length to form a tight edge. If hand-stitching, consider a blanket stitch or a backstitched finish at the start and end for security.
After stitching the full edge, reinforce corners with extra backstitches to resist high-stress points. Finish by trimming loose threads and testing the bond from the inside with a light press using a cloth to protect the patch and fabric.
Iron-On Patches Instructions: Quick, Heat-Setting Solutions
Iron-on patches reduce setup time and work well on cotton, denim, and some canvas fabrics. Follow iron-on patch instructions carefully to ensure a durable bond, while noting that performance can vary with fabric blends.
Test fabric compatibility first by applying heat to a small, inconspicuous area with no steam. Prepare the patch on the garment, cover with a pressing cloth, and press firmly at the recommended temperature (often around 300–350°F / 150–175°C) for 20–30 seconds without moving the iron. Check adhesion after cooling and repeat as needed.
Some patches benefit from a second pass on the outer edge to seal any areas that didn’t fuse completely. If you’re applying over a seam or curved region, re-check alignment after cooling and re-press as necessary. While iron-ons are convenient, they may not last as long as sew-on patches in high-wear situations.
Adhesive Patch Method: Glue-On Convenience and Considerations
Adhesive patches use fabric-safe glues or double-sided textile tape to bond patches without sewing. This method is ideal when sewing isn’t possible or when you need a reversible option for certain uniforms or delicate fabrics.
Choose a fabric-safe adhesive, or use a two-sided tape designed for textiles. Clean and dry the surface, place the patch, and press firmly across the entire area for a strong bond. If using fabric glue, apply a thin, even layer to the patch backing and press it into place.
Allow the adhesive to cure as advised by the manufacturer, typically 24 hours for a full bond. Avoid laundering or heavy handling during curing to maximize adhesion. Some adhesives can be reinforced with a light interior stitch along the border for added security, extending the patch’s life without committing to a full sew-on approach.
Care, Troubleshooting, and Common Mistakes for Long-Lasting Custom Embroidered Patches
No matter which method you choose, proper care extends the life of patches. Turn garments inside out before washing, use a gentle cycle, and wash in cold water when possible. If you used iron-on or adhesive patches, avoid high-heat cycles and aggressive abrasion during the initial days after application.
Common mistakes to avoid include skipping fabric preparation, applying patches at the wrong temperature, using the wrong stitch type, or rushing the curing process for adhesive patches. For iron-on methods, neglecting a pressing cloth or testing fabric compatibility can lead to scorched patches or uneven adhesion. With sew-on patches, skipping secure edges or cutting corners around curves increases the risk of peeling.
Practical tips for beginners and seasoned crafters alike include pre-washing fabrics, using a contrasting thread for defined borders, investing in sharp scissors and a fine-tine needle, and following a measured approach to heat and curing. These steps help ensure your patches tell their story with color, shape, and detail preserved over time.
Frequently Asked Questions
What are the best methods to apply custom embroidered patches, and when should I use sewing patches onto fabric, iron-on patches, or the adhesive patch method?
Choosing the right application method for custom embroidered patches depends on durability, fabric, and laundering. Sew-on patches onto fabric offer the strongest, most durable hold for items like denim or canvas. Iron-on patches are quick and easy, ideal for temporary fixes or when you want a no-sew option. Adhesive patch method provides a convenient, reversible solution when sewing isn’t possible, though it may not endure frequent wash cycles. Pick based on fabric type, wear, and care needs.
How do you properly sew patches onto fabric to get the strongest hold with custom embroidered patches?
To sew patches onto fabric for custom embroidered patches: position and pin, choose a thread color that blends or matches, select a sturdy needle (e.g., 90/14), and use a zigzag or satin stitch with about 2.0–2.5 mm stitch length. Stitch around the edge with small, even stitches, reinforce corners, then finish by trimming threads and pressing from the inside with a cloth. This yields a durable, professional edge.
What are the essential iron-on patches instructions for applying custom embroidered patches on different fabrics?
Iron-on patches instructions: test fabric compatibility on a small area with a low-heat setting before applying. Place the patch on the desired spot, cover with a pressing cloth, and press firmly at 300–350°F (150–175°C) without steam for 20–30 seconds. Check adhesion; if needed, re-press for another 10–15 seconds and let cool completely before testing. Some patches may require a second pass on the edge for a secure bond, especially on curved areas.
When should you choose the adhesive patch method for custom embroidered patches, and how should you apply them?
Adhesive patch method: choose a fabric-safe adhesive or two-sided textile tape. Ensure the surface is clean and dry. Peel back the backing of the patch to reveal the adhesive, place it on the fabric, and press firmly across the surface. Allow the adhesive to cure (often 24 hours) before laundering; for extra security, you can add a light interior stitch along the border. Note that adhesion can weaken with washing, so use on suitable fabrics and care for the patch.
How do backing types affect applying custom embroidered patches and which is best for longevity: sew-on patches, iron-on patches, or adhesive patches?
Backing types affect both how you apply and how long custom embroidered patches last. Sew-on patches deliver the strongest, most durable hold and are best for items washed frequently or under stress. Iron-on patches offer fast application but may loosen on high-wear or heat-exposed areas. Adhesive patches are convenient for temporary or reversible applications but generally don’t withstand repeated washing as well. For longevity, choose sew-on backing for active wear and follow fabric-specific care guidelines.
| Aspect | Key Points |
|---|---|
| Sew-on patches | Most durable; best for active wear and items washed often; edge stitched with zigzag/satin stitch; suitable for denim, canvas, twill, heavy cotton; corners reinforced at stress points. |
| Iron-on patches | Fast, no-sew option; suitable for cotton, denim, canvas; uses heat-activated adhesive; test fabric compatibility; may require a second pass or interior stitch for longevity; less durable in high-wear areas. |
| Adhesive patches | Convenient for temporary or non-sew projects; glue or double-sided backing; requires cure time; may not withstand frequent washing; can be reinforced with light stitches for security. |
| Preparation | Pre-wash fabrics to remove sizing; check patch backing; gather needles, thread, scissors, iron, press cloth; align patches with pins/markers; set up a flat workspace. |
| Choosing the method | Choose method based on fabric, wear, and laundering expectations; sewing for durability; iron-on for quick applications on stable fabrics; adhesive for delicate or temporary uses; test patches first. |
| Care & maintenance | Turn garments inside out; gentle cold-water wash; avoid high heat; air-dry when possible; for iron-on/adhesive, avoid aggressive cycles early after application; consider light interior ironing if needed. |
| Common mistakes | Skipping prep, using wrong temperature, incorrect stitches, rushing curing for adhesives; not testing; failing to finish edges or align patches properly. |
| Practical tips | Pre-wash fabrics and patches; use contrasting thread for visible borders or match for a seamless look; sharp scissors; suitable needles; proper heat settings for iron-ons; allow adhesive cure time. |
Summary
Custom embroidered patches can be used to personalize jackets, bags, uniforms, and more with a durable bond or quick, heat-activated options depending on the fabric and project. This overview highlights three primary methods—sewing patches onto fabric for maximum durability, iron-on patches for fast, no-sew application, and adhesive patches for easy placement—along with preparation steps, tool needs, care guidance, and common pitfalls. By selecting the appropriate method for your fabric and wear, preparing properly, and following maintenance guidelines, your patches will maintain color, shape, and detail through many washes and uses.