
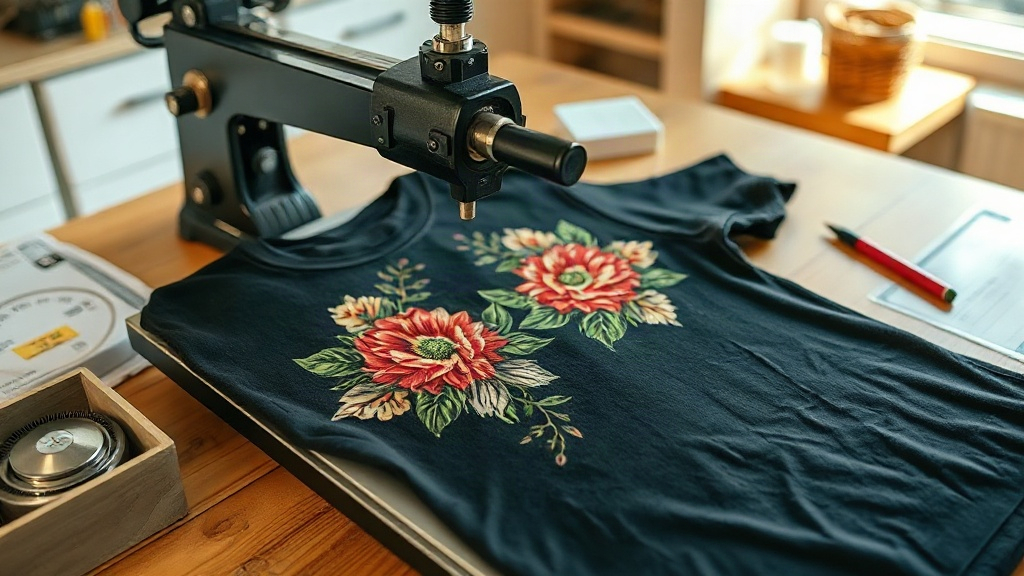
Imagine transferring a full-color design onto a dark cotton t-shirt with the ease of a heat press and the vibrancy of screen printing. That's the promise of DTF printing, a technology that has rapidly gained popularity among crafters and small business owners. Unlike traditional methods, DTF (Direct to Film) allows you to print intricate details and gradients without the hassle of weeding or color limitations. In this guide, I'll walk you through everything you need to know to get started with DTF printing, from the basic process to practical tips I've learned from my own experience.
What Exactly Is DTF Printing?
DTF stands for Direct to Film. It's a printing method where your design is printed onto a special film, coated with a thermoplastic powder, and then heat-pressed onto fabric. The magic happens because the film transfers the ink and adhesive onto the garment, creating a durable and vibrant print. Unlike DTG (Direct to Garment), which prints directly onto the fabric, DTF uses a two-step process that works on a wide range of materials, including cotton, polyester, blends, and even leather. This versatility is one reason why DTF has become a go-to for custom apparel.
How Does the DTF Process Work?
The DTF process involves several steps, each crucial for a successful transfer. Here's a breakdown:
- Design Preparation: Create your artwork in a graphics program. Remember to mirror the image before printing, as the film will be flipped during transfer.
- Printing: Use a DTF printer with specialized inks (usually CMYK plus white) to print onto a PET film. The white ink acts as a base, allowing the colors to pop on dark fabrics.
- Powdering: While the ink is still wet, apply a hot-melt adhesive powder evenly over the print. Shake off the excess.
- Curing: Place the film in a curing oven or under a heat press to melt the powder. This step bonds the powder to the ink.
- Transfer: Position the film onto your garment and apply heat and pressure with a heat press. The adhesive melts, transferring the design to the fabric.
- Peeling: Once cooled, peel away the film. Your vibrant design is now permanently attached to the garment.
Each step requires attention to detail. For instance, under-curing the powder can lead to washes out, while over-curing might cause the film to become brittle. I've found that following the manufacturer's guidelines for your specific printer and powder is key.
Why Choose DTF Over Other Printing Methods?
If you're wondering whether DTF is right for your projects, consider these advantages:
- No Weeding: Unlike vinyl, there's no tedious weeding process. You print, powder, and press. This saves hours on complex designs.
- Full-Color and Gradients: DTF excels at reproducing photorealistic images and smooth gradients, which are challenging with screen printing or vinyl.
- Works on Many Fabrics: From 100% cotton to polyester and even treated leather, DTF adheres well. This makes it ideal for diverse product lines.
- Durability: When done correctly, DTF prints withstand repeated washing without fading or cracking. I've had shirts that have gone through dozens of cycles and still look great.
- Cost-Effective for Short Runs: For small batches or one-off items, DTF is more economical than screen printing, which requires setup costs per color.
Getting Started with DTF Printing
Ready to dive in? Here's what you'll need:
Essential Equipment
- DTF Printer: Options range from converted Epson printers to dedicated DTF machines. For beginners, a converted printer with DTF ink and film can be a cost-effective entry point.
- DTF Film: Available in sheets or rolls. Choose a film compatible with your printer and powder.
- Adhesive Powder: Typically TPU-based. It comes in fine or coarse grades; fine powder is better for detailed prints.
- Heat Press: A clamshell or swing-away press with accurate temperature and pressure control. You'll need it for both curing and transferring.
- Curing Oven (optional): A dedicated oven ensures even curing, but you can also use a heat press for small batches.
Step-by-Step Tutorial
Let me walk you through a typical DTF project:
- Create Your Design: Use software like Photoshop or Illustrator. Remember to mirror the image and set the color mode to CMYK. For best results, use 300 DPI resolution.
- Print on Film: Load the film into your printer with the coated side facing the printhead. Print using the DTF settings, ensuring white ink is used as a base.
- Apply Powder: While the ink is wet, sprinkle the adhesive powder over the print. Use a powder shaker for even distribution, then shake off excess. You want a thin, uniform layer.
- Cure the Powder: Place the film in a curing oven at around 320°F (160°C) for 2-3 minutes, or until the powder melts and becomes glossy. Alternatively, use a heat press with light pressure for 30-60 seconds.
- Press onto Garment: Preheat your heat press to 325°F (163°C) with medium pressure. Place the garment on the platen, position the film with the design facing up, and press for 15-20 seconds.
- Peel and Enjoy: Allow the transfer to cool completely before peeling off the film. For a matte finish, peel while hot; for glossy, peel cold. That's it!
Practice on scrap fabric first to dial in your settings. Each printer and powder may behave slightly differently.
Common Pitfalls and How to Avoid Them
Even with the best equipment, issues can arise. Here are some common problems and solutions:
- Faded or Cracked Prints: Usually caused by under-curing the powder or insufficient pressure during transfer. Increase curing time or pressure.
- Powder Not Sticking: If the powder doesn't adhere to the ink, the ink may be too dry. Print immediately before powdering, or check that your printer is laying down enough ink.
- Film Sticking to Garment: This happens if you peel too soon. Let it cool completely before peeling.
- Colors Look Dull: Ensure you're using the correct ICC profile for your printer and that white ink is properly layered. Also, use high-quality film and powder.
I remember my first attempts resulted in cracked prints because I was too impatient to let the powder cure fully. Learning from those mistakes, I now set a timer and never rush the process.
DTF vs. Other Printing Methods: A Quick Comparison
To help you decide, here's how DTF stacks up against DTG and vinyl:
- DTF vs. DTG: DTG prints directly onto fabric, which limits it mostly to cotton. DTF works on more materials and often produces more vibrant colors on dark garments. However, DTG has a softer hand feel.
- DTF vs. Vinyl: Vinyl is great for simple, single-color designs but requires weeding and layering for multi-color. DTF handles complex designs effortlessly and is faster for detailed artwork.
- DTF vs. Screen Printing: Screen printing is cost-effective for large orders but has setup costs per color. DTF is better for small batches and photorealistic images.
Ultimately, the choice depends on your specific needs. For a home-based business doing custom orders, DTF offers a sweet spot of versatility and quality.
Frequently Asked Questions
What fabrics can I use with DTF printing?
DTF works on a wide range of fabrics, including cotton, polyester, cotton-poly blends, leather, and even some synthetic materials. It's particularly effective on dark colors because the white ink base makes colors pop.
How durable are DTF prints?
When properly applied, DTF prints are highly durable and can withstand 50+ washes without significant fading or cracking. Always follow care instructions: wash inside out in cold water and avoid ironing directly on the print.
Do I need a special printer for DTF?
You can convert a standard inkjet printer (like certain Epson models) to use DTF inks and film, but dedicated DTF printers are also available. If you're serious about production, a dedicated printer with a white ink channel is recommended.
How do I prevent my DTF prints from cracking?
Cracking usually stems from under-curing the adhesive powder or using too little pressure during transfer. Ensure your powder is fully melted (it should look glossy) and apply firm, even pressure with your heat press.
Can I use DTF on 100% polyester?
Yes, DTF adheres well to polyester. However, polyester requires lower pressing temperatures to avoid scorching. Test with a lower temperature (around 300°F) and adjust as needed.
With its versatility and vibrant results, DTF printing opens up a world of possibilities for custom apparel. Whether you're a hobbyist or running a business, mastering DTF can set your creations apart. Start with small projects, learn from each press, and soon you'll be producing professional-quality garments that impress.