
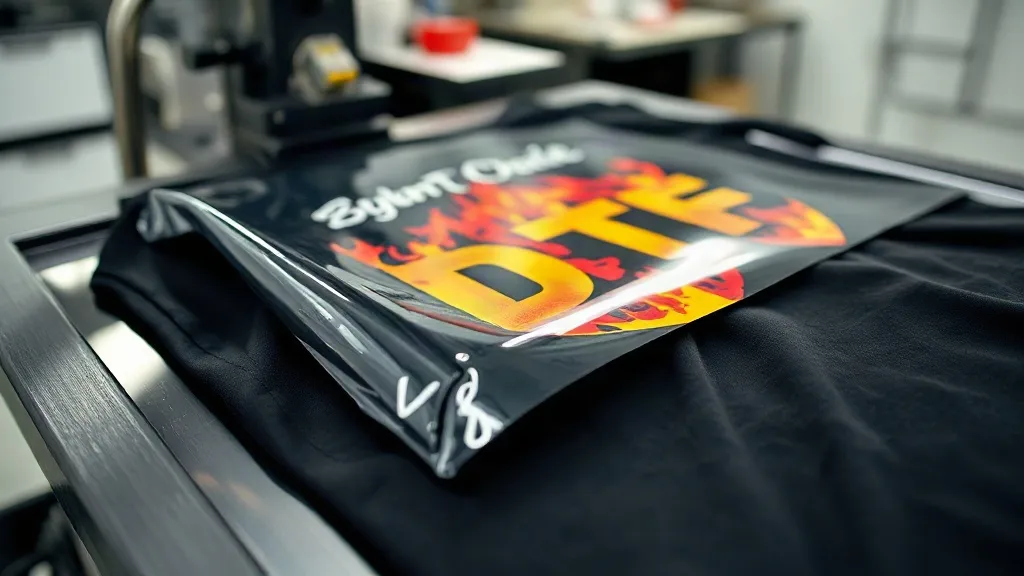
You have probably seen the results: a shirt with a design so bright and detailed it looks like it was printed directly into the fabric. That is the promise of dtf transfers, a digital printing method that has quickly become a favorite for small shops and DIY creators. But between the glossy film, the sticky powder, and the heat press, there is a lot that can go wrong if you do not understand the process. This guide is not about shortcuts; it is about the details that separate a print that survives fifty washes from one that peels after five.
The Three Pillars of a DTF Print
Every DTF transfer is built on three elements: the film, the powder, and the press. Each plays a distinct role, and skimping on any one of them will show in the final product. Let us break them down.
Film: The Foundation
DTF film is not just any plastic sheet. It has a special coating that receives the ink and later releases it onto the fabric. There are two main types: cold peel and hot peel. Cold peel film requires the transfer to cool completely before you remove the carrier sheet, which can give a slightly smoother finish but slows down production. Hot peel film lets you remove the sheet while it is still warm, speeding up the workflow. For beginners, hot peel is often more forgiving because it reduces the chance of accidentally pulling up the design edges. Whichever you choose, store film in a dry place and avoid touching the printable side; oils from your fingers can cause ink to misbehave.
Powder: The Adhesive That Makes It Stick
After printing, while the ink is still wet, you apply a thermoplastic powder. This powder melts during curing and forms a flexible adhesive layer that bonds to the fabric. The powder must be applied evenly. Too little, and the transfer will not adhere properly; too much, and you get a stiff, crusty feel. A simple trick is to use a powdered applicator bottle or a shaker with fine holes, then gently tap off the excess. You can also invest in a powder shaker machine, but for low volume, manual application works fine with practice.
Press: Heat and Pressure
The heat press is where the magic happens. Temperature, pressure, and time all need to be dialed in. A common starting point is 320°F (160°C) for 10-15 seconds with medium pressure. But these numbers are not universal; they depend on your press, the film, and the fabric. Always do a test press on a scrap piece of the actual garment you plan to use. And do not forget to pre-press the garment for a few seconds to remove moisture and wrinkles.
Step-by-Step: From Design to Finished Shirt
Let us walk through the process from start to finish, highlighting the checkpoints that matter most.
1. Prepare Your Artwork
DTF printing uses CMYK inks, so your design should be in CMYK color mode. Ensure your image is high resolution (300 DPI at final size). If you are printing white text or light colors on dark fabric, you will need a white ink layer. Most DTF printers handle this automatically, but check your printer settings. Also, mirror your design horizontally before printing; otherwise, it will transfer backwards.
2. Print the Film
Load the film into your DTF printer with the coated side facing the printhead. Follow your printer's guidelines for ink limits; over-inking can cause the powder to stick too heavily. After printing, handle the film by the edges to avoid smudging.
3. Apply Powder
While the ink is still wet, sprinkle the powder over the printed area. You can do this over a tray to catch excess. Then, tilt the film and tap it gently to distribute the powder evenly. Shake off any excess back into the container for reuse. The goal is a thin, uniform coating that looks like a light dusting of snow.
4. Cure the Powder
Curing melts the powder into a continuous adhesive layer. You can use a heat gun, a conveyor oven, or even a heat press (with the film open) for this step. The powder should melt and become glossy, but not bubble or scorch. With a heat gun, keep it moving and watch closely; it takes only seconds. Over-curing makes the transfer brittle, while under-curing leaves loose powder that will clog your press.
5. Press the Transfer
Now you are ready to press. Place the transfer face-down on the garment. Use a Teflon sheet or parchment paper to protect your press. Press at the recommended temperature and time. For hot peel, remove the film immediately in a smooth, steady motion. For cold peel, wait until it cools completely. Then, do a second press with a Teflon sheet for a few seconds to smooth the print and ensure full adhesion.
Common Mistakes and How to Fix Them
Even experienced operators run into issues. Here are the most frequent ones and their solutions.
- Peeling after washing: Usually caused by insufficient pressure or under-curing. Increase pressure and check your curing step.
- Stiff, crusty feel: Too much powder. Apply less and tap off excess more thoroughly.
- Color fading: Over-curing or too high temperature. Lower the temperature and shorten the time.
- Incomplete transfer: Uneven pressure or the film shifted during pressing. Make sure the press is level and the transfer is secured.
Choosing the Right DTF Supplies
Not all DTF supplies are created equal. When sourcing film and powder, look for reputable brands and read reviews. Cheap film can cause ink to bleed or powder to stick unevenly. Powder should be fine and consistent; clumpy powder indicates moisture. For those who want to skip the printing and powder steps, buying pre-made dtf transfers from a supplier is a viable option. This is especially useful if you are just starting out or if you need a design quickly. When searching for dtf transfers near me, check turnaround times and shipping costs, as these can affect your pricing.
Scaling Up: Moving from Hobby to Production
Once you have mastered the basics, you might want to increase your output. Here are some upgrades to consider.
- Powder shaker machine: Automates powder application for consistent results and less waste.
- Conveyor dryer: Ensures even curing and faster throughput.
- Roll-to-roll film: More economical for large volumes.
- Quality control station: Inspect each transfer under good lighting before packing.
Also, keep a log of your settings for each fabric type. Cotton, polyester, and blends all behave differently. What works for 100% cotton may not work for a 50/50 blend. Testing and record-keeping are your best friends.
Frequently Asked Questions
Can I use DTF transfers on dark colors?
Yes, DTF is excellent for dark fabrics because the white ink layer provides a bright base. Just ensure your printer has white ink and that the white layer is properly maintained.
How long do DTF transfers last?
With proper application and care, a DTF transfer can last as long as the garment. Wash inside out in cold water and avoid harsh detergents. Do not iron directly on the print.
Do I need a special printer for DTF?
You can convert some inkjet printers to DTF with a DTF ink system and RIP software, but purpose-built DTF printers are more reliable and easier to maintain.
What fabrics work best with DTF?
DTF adheres well to cotton, polyester, blends, and even some nylons. It is not recommended for fabrics with heavy coatings or waterproof finishes.
How do I store unused transfers?
Keep them in a cool, dry place away from direct sunlight. Stack them with the film side up to avoid powder transfer. Properly stored transfers can last for months.
Mastering dtf printing takes practice, but the payoff is high-quality, durable apparel that stands out. Focus on the details, invest in good supplies, and do not skip the test press. Your customers will notice the difference.